Cleaning the rims is a crucial step in car maintenance, whether you’re a car enthusiast or just like to keep your car clean. However, it doesn’t have to be a weekly chore you dread. If you do it once a week, cleaning can be an easy task that takes less time.
What is the simplest method for cleaning car rims then? The simplest method for cleaning car rims is to first rinse off any dirt with water, then clean the rims with rim cleaner or a homemade solution like dish soap and baking soda. To keep the rims clean for longer, apply a coat of wax after cleaning.
You can clean your car rims using a variety of solutions and techniques, so be sure you know what kind of rims you have and how to clean them. It might not be effective for another type of rim to use what works for one.
How Can The Rims Be Cleaned? (5 Methods)
Utilize a cleaner that is just a little bit abrasive to clean your rims. All over the rims, apply the cleaner. More should be applied to areas where rust or dirt are caked. Utilize a sponge or scrubbing brush to remove the dirt after letting it sit for at least 30 minutes. Rinse with the hose when you are finished. Repeat this procedure if necessary to remove any last traces of dirt or brake dust from the rim.
Before you start the waxing process, it’s crucial to remove all smudges from the rim. Avoid trapping any brake dust particles when waxing because it forms a protective coating. It might eventually cause stains or damage if you do that.
If you want to save money, you can use an auto store-bought rim cleaner, or you can use at-home remedies. Do keep in mind that cleaners designed specifically for cleaning rims will be the safest choice. Home remedies never come without risk because they aren’t designed for your vehicle’s particular requirements.
Before using new products or at-home remedies, always conduct a spot test. Instead of scratching up the entire rim, it is preferable to test them in a hidden location. Even though rim cleaner is designed with rims in mind, there is a chance that you will purchase the incorrect item or that your rims are made of something other than what you initially believed. Spot testing will stop serious issues from developing later.
Oven Cleaner
Because it is a degreaser designed to remove tough stains, oven cleaner is frequently used and suggested by many drivers. Oven cleaner should be sprayed evenly over the entire rim and left there for thirty minutes before you wipe it off. This will give it time to work on dirt, tar, and grease so that it can be washed away with water.
Depending on the manufacturer, the bottle may claim that it can be used on any stainless steel surface. This ought to function properly on a variety of automobile rims. Before applying it to the entire rim, you should think about finding a different brand or spot testing it if it doesn’t specify that it will work on any stainless steel surface. It’s important to remember that some drivers advise against using oven cleaner on aluminum alloy rims.
Wd-40
A great way to spot clean rims if they get splashed with mud or tar is to use Spray WD-40 onto the area until it is completely covered, and then scrub it with a brush. Because WD-40 is a slippery substance that could potentially be dangerous if any is left behind, rinse with water and make sure all of it has been removed.
Dish Soap
Dish soap is also frequently used because it contains degreasers. Dish soap is an excellent choice for both tires and rims because it can remove oil as well.
Dish soap can be used on rims in a manner similar to that of tires. Only that you should use less water than you would for tires should be considered a difference. Mix one part soap with one part water. It is best to use more soap so that there is more degreaser to do the dirty work since you want your rims to shine.
Just a few minutes should pass after the suds have sat before you start to scrub. The suds shouldn’t be allowed to dry because they will leave rim stains if they do. After applying the soap, scrub with a sponge and baking soda. The abrasive properties of baking soda will help to remove dirt and rust.
This method works well, but as with any other method, use it again if the first attempt doesn’t completely remove the spots. Consider using additional home remedies in addition to this one since some of them are designed to be applied locally.
Soft Drinks
Cola contains phosphoric acid, which can remove rust, but there is no guarantee that it will completely remove it, so the experiment may be hit or miss. It might be worth a shot if you’re in a tight spot. Make sure to thoroughly rinse off all of the cola with water because it will make the surface sticky and encourage dirt to stick to it.
It might be possible to get rid of stains on aluminum by mixing lemon juice and soft drink. It’s possible that this is more of an experiment than a fix. While the acid in the lemon juice cleans, the soft drink will act as an abrasive. Apply the solution to the rim’s dirty areas, scrub with a brush, and then rinse with water.
Cream Of Tartar
Potassium bitartrate, also referred to as cream of tartar, is a fantastic way to remove stains that resisted being removed by soap or other cleaning agents. To make a paste, combine it with a small amount of water. After applying the paste and using a brush to scrub the grimy area, rinse with water.
What Must Be Done By You? (step-by-step Guide)
Step 1: Turn Off Your Car And Check If The Tires Are Ready To Be Cleaned
Turn off your car first, then make sure the tires are cool to the touch. If it is still warm or hot, wait until it is no longer before proceeding to the next step.
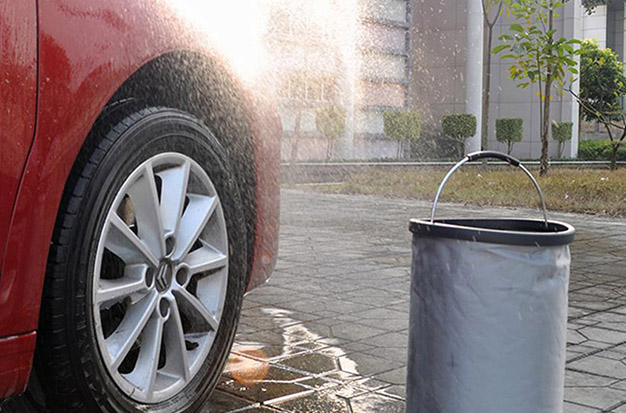
Step 2: Get Rid Of As Much Loose Filth As Possible With A Hose
Second, grab your garden hose and spray the filthy wheels with it. Ensure that the hose’s water stream has a high pressure. Otherwise, the gunks won’t be able to be forced out. Spray vigorously to remove as much loose dirt as you can. The more you can get rid of now, the simpler it will be later.
Step 3: Apply The Wheel Cleaner As Guided In The Descriptions
Apply the wheel cleaner you made in step three. Use it as directed and make sure you do. Specific usage guidelines will be provided with each product. While some cleaners must sit for a short while, others are immediately ready for scrubbing. Do not deviate from the instructions on your cleaner’s packaging or description.
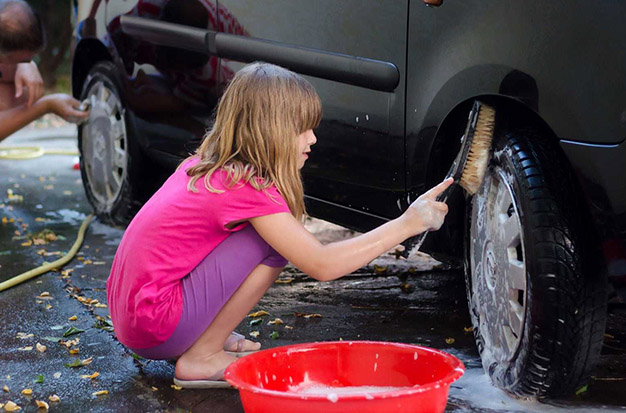
Step 4: Scrub The Wheel And Rims With A Brush In Circular Motions
Fourth, scrub using a wheel cleaning brush and circular motions. Be careful and make sure to get into every crevice.
Step 5: Rinse The Cleaning Solution Away With A High-pressure Hose
Fifth, rinse the cleaning agent off. The high-pressure hose from the first step should be used again. Verify that no residues remain. The majority of cleaners contain substances that shouldn’t be left on your wheels and rims for an extended period of time. Make sure the tires are completely hosed down and be careful.
Step 6: Scrub The Wheels And Rims Thoroughly With A Diy Solution
Sixth, use a DIY solution to give your rims and wheels another wash. Combine water and car-washing soap in a bucket. After that, scrub with a microfiber towel that has been dipped in the solution. Once more, move in a circular motion. Working your way inward, begin at the rims’ outermost edge. Spend some time scrubbing thoroughly, paying special attention to the crevices.
Rinse it off and re-soak the towel in the solution to continue scrubbing when you see that it is gathering dust, dirt, grease, or grime. Until you are certain that the tires are free of debris, repeat this step as often as necessary.
A toothbrush can be used to scrub the difficult-to-reach areas.
Step 7: Rinse The Wheels And Wash Off All The Soap
Seventh, use the high-pressure hose to rinse the freshly scrubbed wheels and rims. Tires should have all soapy residue on the outside and inside removed. Make sure they are clean before moving on to the next step.
The materials in your tires could be harmed by residue, which can etch them. Always remember: It’s better to be safe than sorry! Verify three times to be sure.
Step 8: Dry All The Wheels And Rims Completely
Eighth, allow it to drip dry for two to three minutes. Then, pat it dry with a brand-new, dry microfiber towel. To complete this step for all four tires, you might need to use multiple towels. Although it takes a little time, you can be sure that the results are worthwhile.
Step 9: Coat A Protective Layer To Prevent Future Filth
For the final step, give your wheels and rims a protective coating. Consequently, dirt won’t stick to your tires. Your subsequent cleaning session will be less laborious and more time-efficient as a result.
There you have it, then! Congratulations on finishing reading the entire guide to cleaning car wheels and rims. Now that you’ve read it, put it to use. It wasn’t as hard as you thought, am I correct?
Conclusion
As you’ve read, washing car tires involves more than just blasting them with water at high pressure. There are materials you need to gather and steps you need to take carefully. The initial step is to read about cleaning auto rims. The next step is to put what you have learned into practice.
Just keep in mind that there are nine steps to follow, starting with turning off your car and determining whether the surfaces are ready for cleaning, followed by drying them off and applying a protective coating to shield them from future dirt.