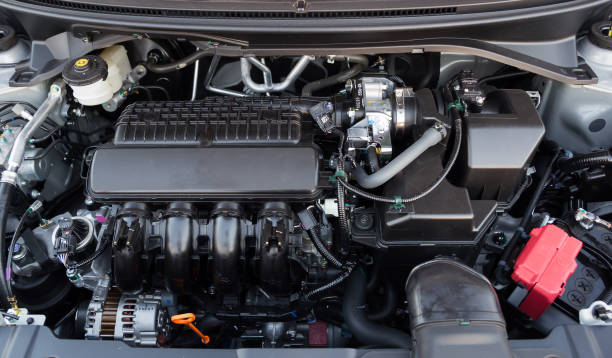
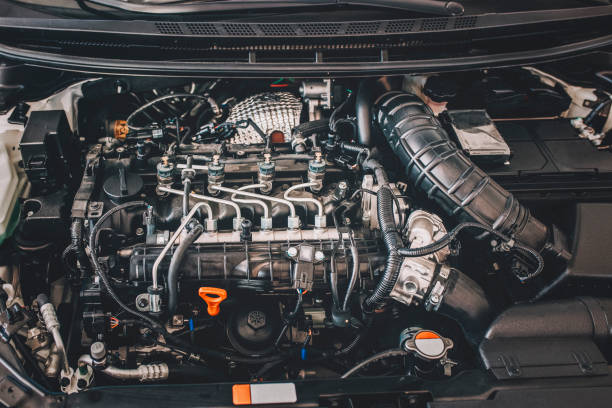
Many people avoid cleaning the engine bay of their cars when they go to wash them because they are afraid to open the hood. Cleaning around electrical connections, wires, air filters, sensors, and other electrical parts can be challenging without getting them wet. Fortunately, most of the items under your hood can tolerate light moisture as long as it doesn’t become soaking wet. You won’t have to worry about your car not starting again or having to replace anything if you follow this guide when cleaning under the hood.
What You Will Need to Follow This Tutorial?
Working around delicate components and clearing up a lot of greasy mess may be required when cleaning under the hood. However, you can make cleaning more convenient for you by using the tools listed below.
• Leaf Blower or Air Compressor – To blow out debris from the engine, you can use either. Both would be helpful for drying the engine.
• Drip Pan, Absorbent Mats, and/or Rags – Any of these can be used to either scrub and clean the engine or collect the runoff from it.
• Plastic Bags – Plastic bags are used to cover the water-sensitive engine components.
• Tape – Plastic bags can be taped shut for security.
• Socket – To unfasten the battery cables, we use sockets. Verify that you are using the correct size.
• Degreaser – To remove all the oil and fuel buildup on the engine’s surfaces, you need a cleaner or degreaser under the hood.
• Stiff-Bristled Brush – Use a stiff-bristled brush to remove caked-on dirt and oil.
• Power Washer or Hose – You can rinse using either method.
• Microfiber Towel – To dry the engine, use a microfiber towel.
• Engine Protectant – The agent will make the engine appear brand-new, make future cleaning simpler, and stop its vinyl, plastic, and rubber parts from cracking and breaking.
Step-by-step Guide
Step 1: Cool Down the Engine
Nevertheless, some advice suggests cleaning the engine while it’s still slightly warm because this helps remove the gunk and dirt. However, cooling the engine down first before cleaning would be the best way to avoid damaging it in any way.
Its components would break or become damaged if you cleaned it while it was hot. Dealing with a hot engine could also cause you to get burned.
Step 2: Remove the Debris
Any debris that is within reach can be picked up, including that which is in the grille, below the windshield, and around the fenders. You can use a leaf blower or air compressor to blow out hard-to-reach debris.
Step 3: Place a Drip Pan Beneath the Engine
Road grit, oil, and chemicals would be removed from the engine when you washed under the hood. You wouldn’t want them to pollute the waterways or stain the garage floor. Put a drip pan underneath the engine to catch them.
If you believe the drip pan won’t be able to catch all of the grimy mess, you could also place some absorbent mats or rags around it. If you don’t have a drip pan, you can also just use absorbent mats and rags.
Step 4: Protect the Sensitive Parts With Plastic Bags
The engine’s delicate components must be covered with plastic bags and taped shut before you wash it. The operation of the car depends particularly on the components that can be harmed when in contact with water. By shielding them, you can clean them more thoroughly while avoiding engine damage.
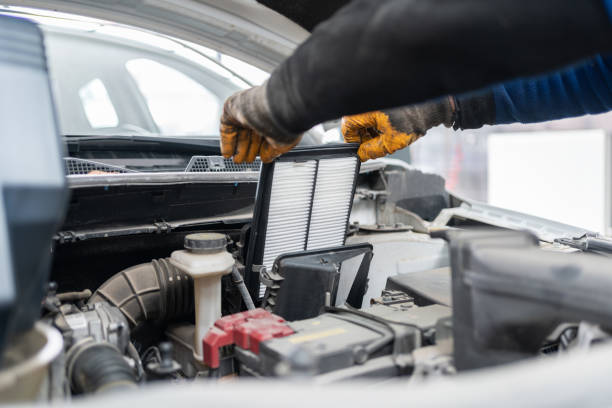
Step 5: Remove the Filters and Battery Cable
For some of them, the simple covering is insufficient, or plastic bags cannot be used to protect them. It will be necessary to remove such components as the battery cables and air filters.
The air filters must first be removed. These areas are extremely water-sensitive. Additionally, water can build up in them, which may harm other engine components. The air intake filter will probably need to be removed. The cabin air filter would also need to be taken out if it was exposed.
To avoid a short in your car when water comes into contact with the engine, the battery cables should also be unplugged. The cable nuts holding the battery cables to the battery should be loosened using an appropriate-sized socket. Remove the positive cable first, then the negative cable.
To avoid a short in the car after the positive cable has been removed, keep it away from any metal components.
Step 6: Spray Degreaser on the Engine
The engine often becomes extremely greasy. Consequently, you must liberally spray degreaser on it when washing the underside of the hood.
Spray it on the fluid containers, non-sensitive metal components, hoses, and parts of the engine. Degreaser should not be sprayed on delicate areas that have electronic connections or where it could leak or drain into the engine.
You may need to let the degreaser sit for 10 to 20 minutes or longer, depending on how greasy the engine is, before moving on to the next step. However, if it’s not overly greasy, you can simply spray a coat on its surfaces and move on to the next stage.
Step 7: Scrub the Surfaces of the Engine, Rinse and Repeat If Necessary
Scrubbing might not be necessary if the engine is not too filthy. Rinse the engine if you want. However, scrubbing is required if you see any areas with oil and dirt caked on. With a rag, clean the engine’s surfaces of grease and grime. Clean with a stiff-bristled brush for buildup that has been caked on.
If you don’t have a power washer, you can rinse with a hose or another method. Use a power washer only on the lightest setting when rinsing. Rinse as well, moving from the back to the front.
Rinse the degreaser out completely. On the other hand, try to avoid spraying too much water or directly at electrical components or areas that take a while to dry.
Step 8: Dry the Engine
It is best to dry the engine yourself rather than letting it air dry so that it is thoroughly and quickly dried and water does not get into any of the sensitive parts.
A leaf blower or an air compressor can be used to speed up drying in addition to using a microfiber towel. Make sure it is completely dried, paying special attention to difficult-to-reach areas and regions where water may collect and become unable to drain.
In order to avoid polluting the waterways, properly dispose of the engine’s runoff after cleaning it. Don’t flush them down the toilet. Pouring them on the ground or the street will only postpone the release of those chemicals until the next rain.
Instead, use a funnel to pour them from the drip pan into a metal or plastic container made specifically for fuel or oil. Send the runoff to any auto repair shop; many of them will dispose of such chemicals for no cost. But to be certain, get in touch with them first before sending the run-off.
Step 9: Remove the Plastic Bags
Before you remove the plastic bags, wipe them off for added security. When they have dried, carefully remove them from the delicate areas.
Step 10: Apply Protectant to Vinyl, Plastic, and Rubber Parts
Applying an engine protectant to the vinyl, plastic, and rubber parts is an extra step you can take when detailing under the hood. However, do not apply it to the delicate areas that have been covered with plastic bags.
Step 11: Replace the Parts Removed
Reinstall the battery cables and filters after your car’s engine has been thoroughly cleaned and shielded.
Summary: Take the Appropriate Safety Precautions
Now that you know how to properly clean under a car’s hood, getting started shouldn’t be difficult. Before performing any cleaning, make sure you take the appropriate safety precautions.
In the comments, please let us know what you think and whether you like it. Additionally, it would be wonderful if you could let other car owners know about this article so they can learn about hood detailing.