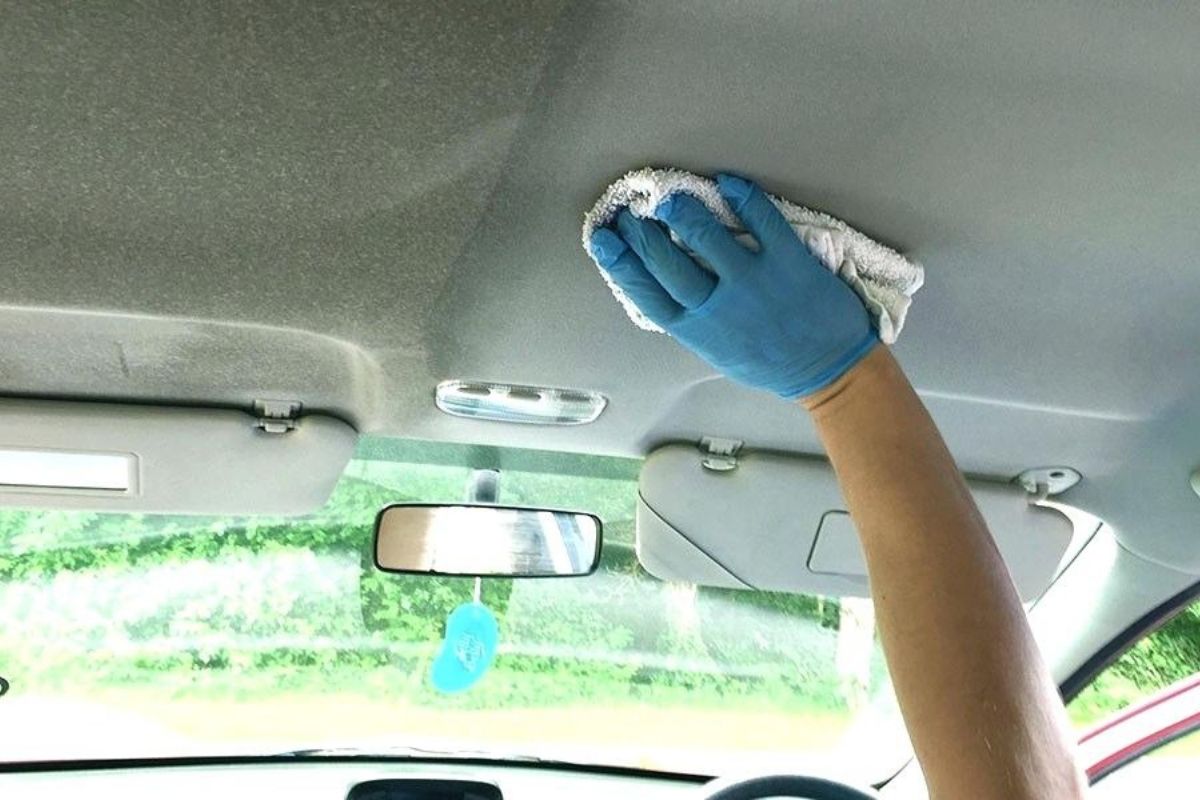
The car ceiling, often known as the headliner, is an area that is sometimes overlooked while cleaning the inside of a vehicle. The headliner would eventually acquire dirt and stains, making your car seem older. It would also absorb scents and smoke, which can be unpleasant when driving.
The headliner should be cleaned as part of your semi-annual or yearly auto detailing. You may save money by doing it yourself instead of hiring a professional detailer. The best way to clean a car headliner depends on its condition.
Minor stains may just require cleaning with a towel and a fabric cleaner. For tougher or larger stains with odor, spray the whole area of the headliner and gently massage it. A steam cleaner is also required to clean a soiled headliner.
Although there are several techniques for cleaning a vehicle headliner, all should be done with care to minimize damage.
Preparation for cleaning
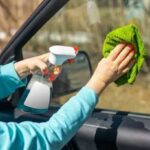
The cleansing merchandise wished for cleansing a headliner would fluctuate from simply a easy microfiber material to a huge cleansing laptop that is the steam cleaner. Find out what equipment you would want below:
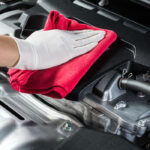
1. Microfiber Cloth
Whether you’re going to simply gently rub a few spots or smooth the complete floor of the automobile roof, you will be desiring a microfiber cloth. In spot cleaning, this would be used in loosening particles and wiping away stains. In floor cleaning, this would come in available for casting off extra moisture after the whole headliner has been gently scrubbed.
2. Soft-Bristled Brush
A smooth brush would be required in all strategies of cleansing a headliner. It would be used for doing away with free debris in spot cleaning, scrubbing the complete headliner in floor cleaning, and scrubbing after steam cleansing in deep cleaning. So anything cleansing procedure you will be doing, make positive to put together a soft-bristled brush.
3. Car Headliner Cleaner
The cleaner you want relies upon on the type of stained place you have in your headliner. For water primarily based stains like soda and coffee, a conventional upholstery cleaner would work. Or you can also additionally make a DIY popular cleansing answer the use of heat water, white vinegar, and liquid soap.
For oil-based stains like grease, ink, crayon, and makeup, you can also use alcohol and lacquer thinner.
4. Spray Bottle
Car cleansing options come in two types, which are both centred or ready-to-use. If your auto upholstery cleaner is concentrated, you will want a separate spray bottle to dilute your cleansing solution.
5. Steam Cleaner
If your headliner is extraordinarily filthy and stinky, you would want a steam cleaner. A steam cleaner is succesful of getting rid of difficult stains and terrible odors via the warm steam triggered with the cleansing answer it emits.
6. Vacuum Cleaner
Apart from the steam cleaner and soft-bristled brush, you would additionally want a vacuum cleaner to acquire some of the particles you brushed out when deep cleaning.
7. Fans
It’s very essential to dry the headliner absolutely after doing a deep clean, as when the headliner has been soaked for too long, it can also smash the glue and detach the headliner from vehicles as properly as reason the increase of mildew and mildew. A couple of followers would be beneficial when drying the headliner after a deep clean.
Instructions for cleaning step by step
There are three one-of-a-kind strategies of cleansing a headliner. And it is the circumstance of your headliner that determines the nice way to smooth auto headliner for you.
The first technique is the spot clean, which must be finished if your headliner isn’t that soiled and solely has minor stains.
The 2d approach is the floor clean, which would be required if the spot smooth didn’t work or if your headliner had greater stains and began to have awful smells.
The 1/3 method, the deep smooth must solely be executed when your headliner is extraordinarily filthy and has too tons scent caught on it.
Although it is integral to do a deep smooth when your headliner is extraordinarily filthy and stinky, it additionally poses the danger of destroying the headliner if finished wrong. Excess warmth and moisture may additionally soften the headliner’s glue and make it sag and purpose mould and mildew. So it have to solely be the ultimate inn and be executed with caution.
Just observe a few easy steps for the required technique for your headliner. You can discover them below:
Spot Clean
Step 1: Remove Loose Debris With a Microfiber Cloth or Soft-Bristled Brush
You can dispose of the seen unfastened particles on the headliner through gently wiping it away with a microfiber fabric or brushing it out with a soft-bristled brush. Just be cautious now not to rub in the seen filth deeper into the headliner’s fabric. Gently dab or scrub till all unfastened particles is removed.
Step 2: Wipe the Stain With a Microfiber Cloth Sprayed With Upholstery Cleaner
Turn your microfiber fabric over and spray upholstery cleaner on it, gently saturating a small element of the cloth. Then with the moist element of the cloth, gently wipe the stain.
Since you’re solely eliminating a minor stain, you ought to solely work the automobile ceiling cleaner onto the headliner’s surface. There’s no want to let the cleaner saturate through.
Step 3: Remove Excess Moisture, Let Dry Completely, and Check the Stain
After you’ve wiped the stain, put off the extra moisture on the spot you labored on with the aid of blotting it with the clean, dry element of your microfiber cloth. Then wait for the damp location to absolutely dry and test whether or not the stain has been definitely removed.
Surface Clean
Step 1: Spray the Upholstery Cleaner Evenly on the Entire Headliner
The first-class cleaner for this technique would be an aerosol upholstery cleaner. This kind of cleaner works with a foaming action, which correctly breaks up the trapped dust beneath the headliner’s surface.
Evenly spray the aerosol upholstery cleaner all over the headliner, however attempt no longer to saturate it. You should pay one-of-a-kind interest to very soiled areas, edges, and crevices surrounding the lights, overhead console, and sunroof.
Step 2: Let the Cleaner Sit
Let the cleaner work on the stains with the aid of leaving it on the headliner to sit. You ought to do this in accordance with the quantity of time certain in the product’s instructions. This helps stop harm from too tons spraying and scrubbing.
The gentler you work on your headliner, the much less possibly it would get damaged. You can constantly redo the system if you nevertheless aren’t cosy with the cleansing result.
Step 3: Gently Scrub the Entire Headliner With a Soft-Bristled Brush
Using a soft-bristled brush, gently scrub the complete headliner clean. Make certain that you work on each section of the headliner to gain an even clean. If you fail to brush each section, it may additionally be sizeable after the automobile dries.
Step 4: Let the Headliner Completely Dry
If necessary, you might also use a microfiber towel to get rid of extra moisture on the headliner. Then let it air dry. Depending on how damp it is, drying it may additionally take an hour or two.
Step 5: Repeat Steps One to Four if the Stains Still Remain
Tough stains may additionally require a 2nd cleaning. However, if the 2nd cleansing nonetheless doesn’t end result in a smooth headliner, you would have to deep easy the headliner of your car.
Deep Clean
Step 1: Pour in the Upholstery Cleaner and Water in the Steam Cleaner
You have to put together the steam cleaner for use, pouring in the automobile indoors roof cleaner and water as per the guidelines of the steam cleaner. You have to additionally take a look at if the steam cleaner requires the use of a unique cleansing solution.
Step 2: Attach the Appropriate Steam Cleaner Attachment
You would subsequent connect the suitable attachment for the job on the steam cleaner. It would ideally be small and non-abrasive.
Step 3: Let the Steam Cleaner Heat Up
Turn the steam cleaner on and wait for it to warmness up. The time it takes for a steam cleaner to warmness up relies upon on the model, so you can also refer to the guide to understand how lengthy it takes for your steam cleaner to warmth up.
Step 4: Pretreat the Headliner With the Cleaner and Steam, Then Brush and Vacuum
Once the steam cleaner has heated up, it’s time to work on the headliner. You would first pretreat the headliner with the cleaner-induced steam. Then you would scrub with a soft-bristled brush and vacuum the headliner.
When you steam clean, you ought to do it section by way of phase and keep the steamer temporarily onto one headliner part, simply sufficient for doing away with odors & hard stains. You want to pass shortly to forestall over-saturation in any location of the headliner.
The longer you preserve the steamer on one part, the deeper the steam will penetrate, and the greater the glue in the headliner will melt. This will possibly lead to a sagging headliner.
Step 5: Let the Headliner Completely Dry
After deep cleansing your headliner, you must let it dry wholly so that the glue won’t fail and mould and mildew won’t grow. In order to do so, depart the home windows and doorways of your automobile open, and you may also additionally use a couple of followers to resource in the drying.
Step 6: Run a Clean Hand Over the Headliner to Buff Out Tracks
After you easy the headliner in a automobile and dry it, you may additionally word some tracks left on it. You can without difficulty get rid of them with the aid of walking a easy hand over them, however solely when the headliner has definitely dried.
FAQ
What is a top headliner cleaner?
For cleansing your headliner, most material upholstery cleaners will be effective. Some of our pinnacle hints include:
- Glart Interior Cleaner
- Meguiar’s Carpet & Interior Cleaner
- AutoGlym Interior Shampoo
- These are all surprisingly rated and come in an handy to use spray bottle. If in doubt, when the usage of on a giant area, it’s exceptional to spot take a look at in an inconspicuous vicinity to take a look at how it reacts with your fabric.
How do you easy the cloth on the roof of your car?
Your auto headliner is commonly made up of a tender foam, then a backing cloth of fibreglass or cardboard that is included with fabric.
Cleaning of any form has to be carried out carefully, as too a lot water or liquid can purpose your headliner to sag or deform. With this in mind, it’s first-class to pick from one of three techniques when washing your headliner:
- A spot smooth
- A floor clean
- A deep clean
Which one you select will truly rely on how badly your headliner wishes cleaned. If you’re simply dealing with a mark or two then a spot smooth need to suffice, whereas distinguished odours and marks may also want a deep clean.

How do you get water stains out of a headliner?
If you’ve by chance left your sunroof cracked open, you may want to be left with ugly water stains. If your headliner is nonetheless wet, strive to soak up any moisture with a dry microfibre towel. It’s vital then to wait for it to dry earlier than trying any stain removal.
For small or insignificant water stains, you ought to be satisfactory the usage of distilled water and a tender microfibre cloth. If you discover the stain doesn’t come away, observe the above steps for spot cleaning.
Conclusion
Knowing how to clean a car headliner may help you maintain your vehicle clean and odor-free. It will also save you money because you will not need to send your automobile to a detailer. Simply follow the guidelines for any sort of cleaning you desire.
How did you come upon this tutorial? Leave your thoughts in the comments. If you found this information useful, please share it with others who may be interested in cars.